
So you have your infrastructure set up, the next step is to create secure automated deployments.
Prerequisites
Make sure you read part one first by clicking here. This is where we discuss setting up the infrastructure using Terraform.
Step 1) Set up an AWS IAM policy to allow secure deploys
During the last section you likely used root API credentials with Terraform locally. During this section we will be tightening up our security by introducing IAM roles.
A common mistake SysOps make is to share the root credentials with the entire team. All it takes is one disgruntled employee to launch a £20k BitCoin miner in AWS.
This policy has the least amount of permissions required for GitLab to deploy your work.
Replace values MY_ACCOUNT_ID, MY_BUCKET_NAME
{
    "Version": "2012-10-17",
    "Statement": [
        {
            "Sid": "VisualEditor0",
            "Effect": "Allow",
            "Action": [
                "lambda:CreateFunction",
                "s3:PutObject",
                "s3:GetObject",
                "iam:PassRole"
            ],
            "Resource": [
                "arn:aws:lambda:eu-west-1:MY_ACCOUNT_ID:function:ServerlessExample",
                "arn:aws:s3:::MY_BUCKET_NAME/function.zip",
                "arn:aws:iam::MY_ACCOUNT_ID:role/serverless_example_lambda"
            ]
        },
        {
            "Sid": "VisualEditor1",
            "Effect": "Allow",
            "Action": [
                "lambda:CreateFunction",
                "lambda:UpdateFunctionCode",
                "lambda:GetFunction"
            ],
            "Resource": "arn:aws:lambda:eu-west-1:MY_ACCOUNT_ID:function:ServerlessExample"
        }
    ]
}
Step 2) Set up continuous deployment with gitlab-ci.yml
If you're using GitLab, then an optional stage is to add continuous deployment to the project.
We have seen how to deploy to the lambda from the command line, but over time you will forget these steps or add new people to the project. To avoid any cognitive load in switching the project you can convert this into a deployment script easily.
First, create gitlab-ci.yml
build:
stage: build
image: golang:latest
script:
- apt-get update && apt-get install zip -y
- GOOS=linux GOARCH=amd64 CGO_ENABLED=0 go build -o main main.go
- zip -r function.zip main main.go
artifacts:
  paths:
  - function.zip
  expire_in: 1 day
only:
- master

production:
image: python:latest
stage: deploy
script:
- pip install awscli
- aws s3 cp function.zip s3://$BUCKET_NAME/function.zip
- aws lambda update-function-code --function-name "ServerlessExample" --s3-bucket="$BUCKET_NAME" --s3-key="function.zip" --region="eu-west-1"
only:
- master
Before this will work, you need to add your AWS deployment keys as variables, this will allow you to use the AWS credentials without commiting these variables to your repo.
Goto Settings -> CI / CD -> Variables
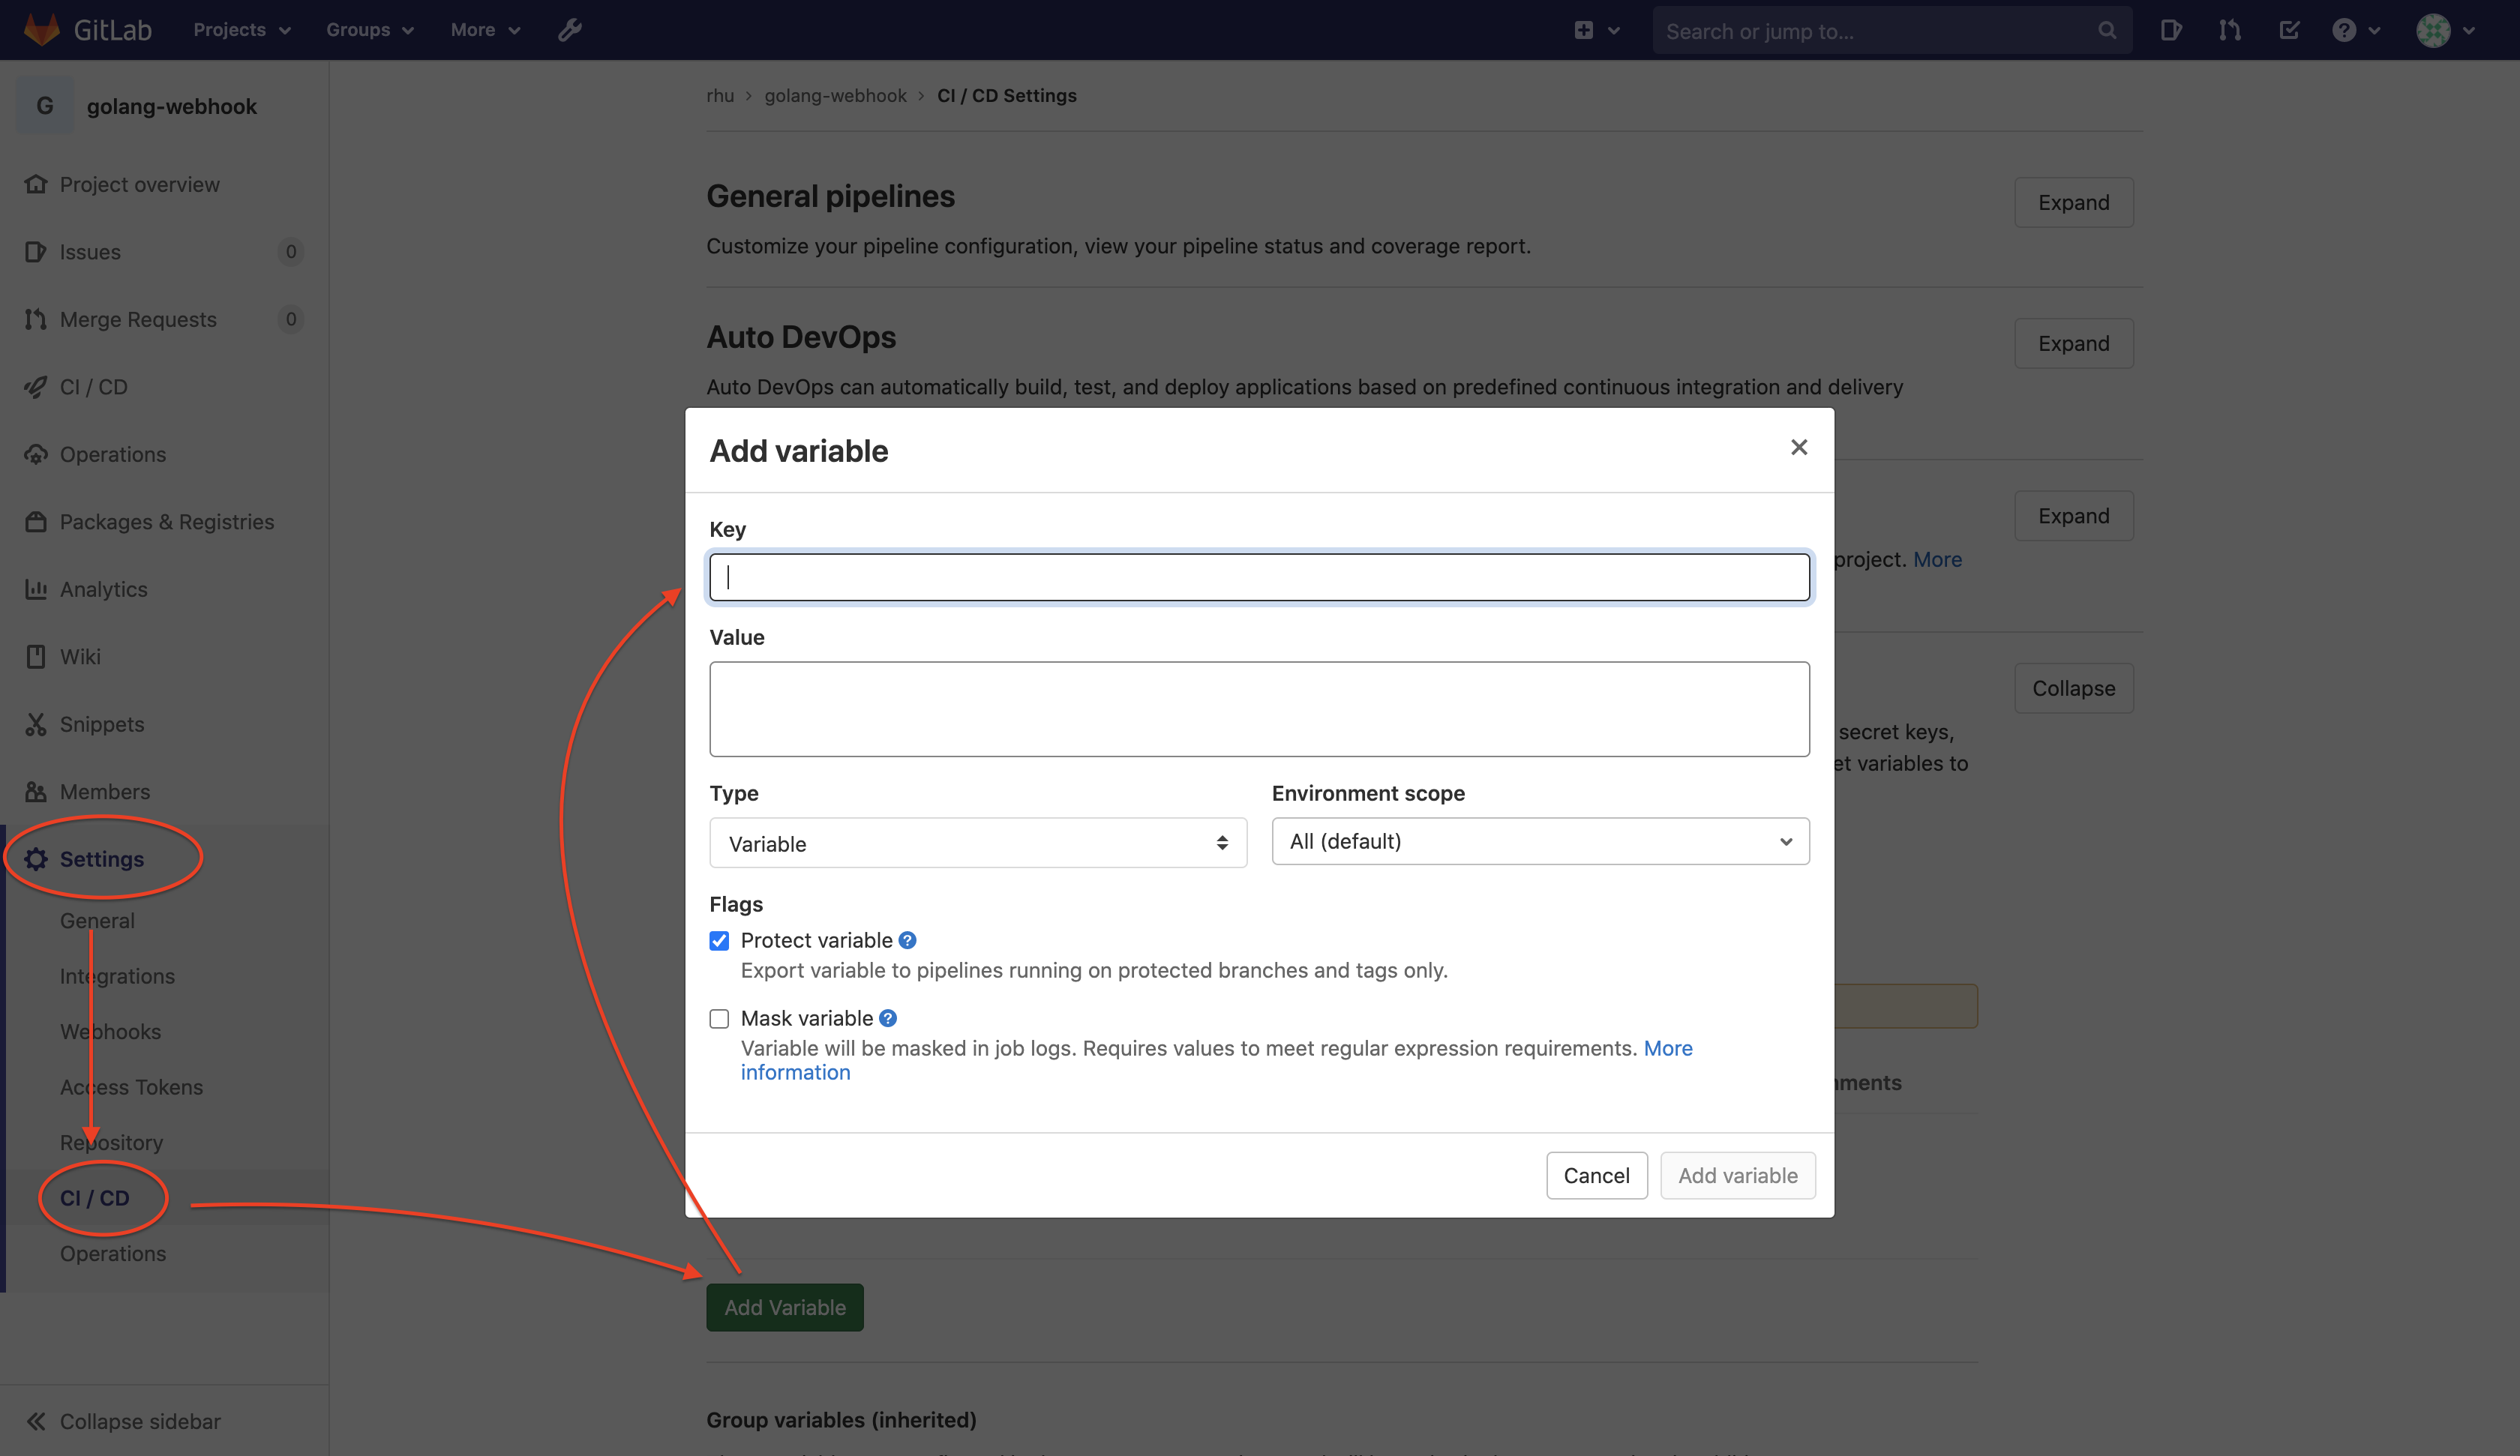
AWS_ACCESS_KEY_ID
AWS_SECRET_ACCESS_KEY
Next, add your unique bucket name you set up earlier:
BUCKET_NAME
Any time you push to your master branch this will now trigger a deploy live.
Step 3) Deploy live!
Edit the Hello World string, commit it and deploy. Within a minute the change will now be deployed live. That's it!
Summary
So continuous deployment makes life easy, and can be extended to include automated tests in future. It is also a huge time saver while onboarding new developers - long gone are the days of having to configure the correct version of capistrano locally, or SSHing into a server to do trigger a deploymet manually.